This guide demonstrates the technique of making a button in the medieval way, by puckering up a round of fabric into a globular button shape. It’s largely based on the instructions from the Medieval Taylor’s Assistant book by Sarah Thursfield - I highly recommend that book to those who already have some sewing experience. Check below the instructions for the full video, or click the GIFs to be taken to that step of the process.
You will need:
Fabric (same as garment)
Needle & Thread
Chalk or fabric pencil
Scissors
Ruler/tape measure
Mark the circle with chalk or fabric pencil
Step 1: Cut Out the Circle
To start, measure and cut out a circle from your fabric that is about 1.5’’ in diameter. You can do so by marking 1.5’’ with the ruler, and then making another perpendicular mark, and drawing a circle.
NOTE: Cut out as many equal circles of fabric as you plan to make buttons so that all of your buttons will be the same size!
Step 2: Stitch It All Around
Next, start shaping the button with a stitch.
I use a bright thread to show the stitches better, but for your garment you will want to match the thread color so that it’s not visible.
In total, you need to make about 10 stitches close to the edge while folding the edge away from you. If you add the stitches close to the middle, the button will not close.
Take your time with this step!
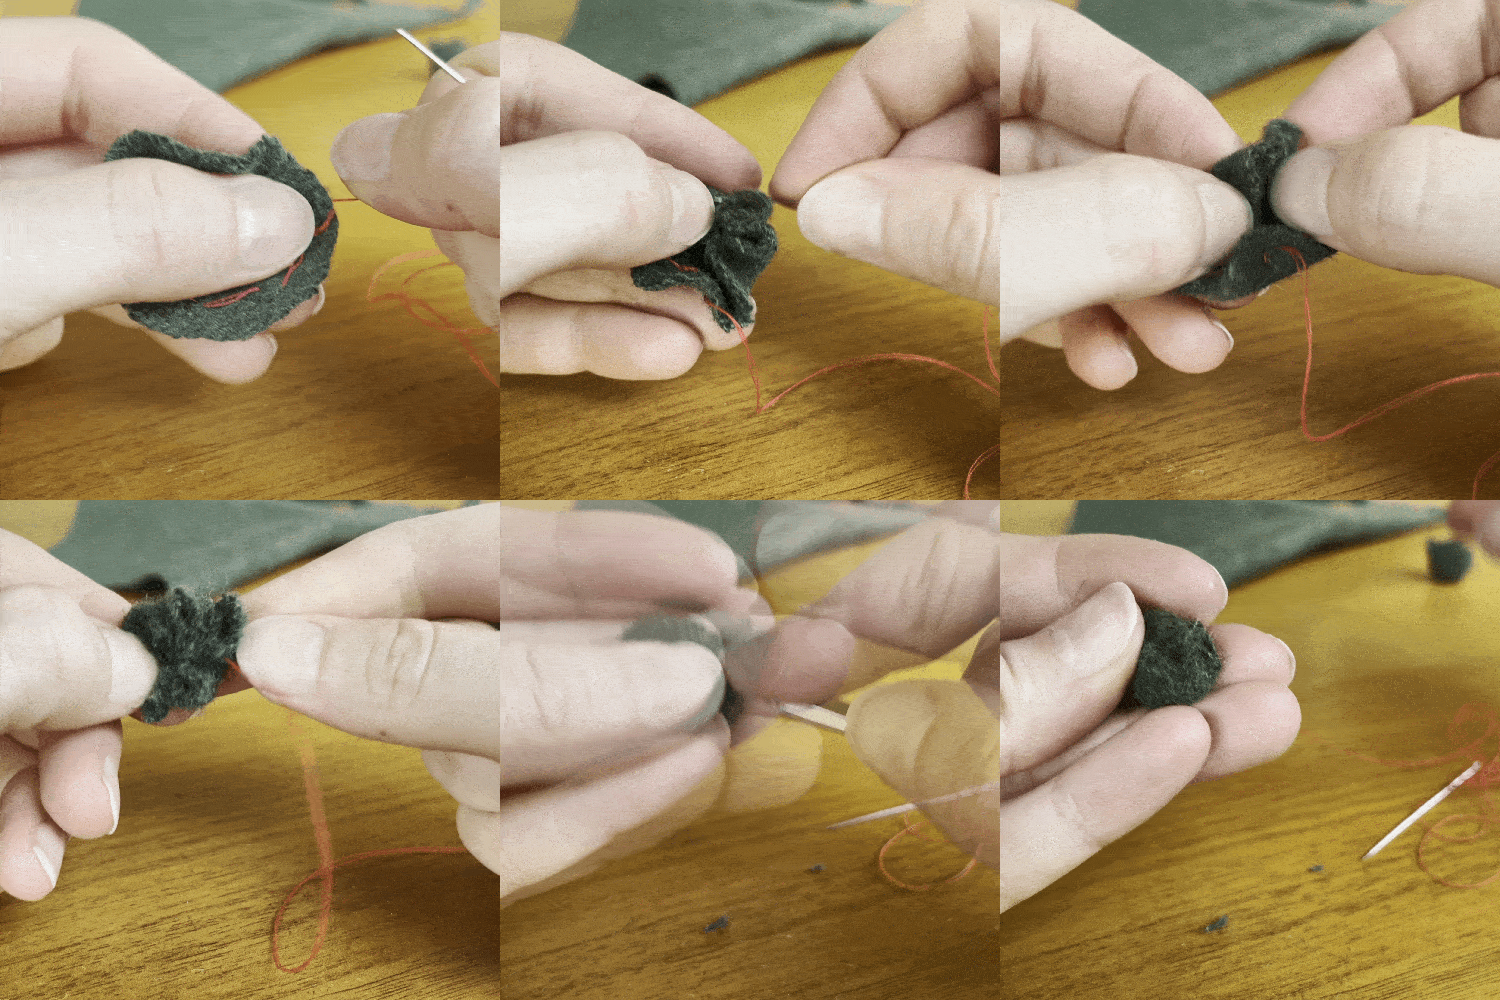
Step 3: Pull & Pucker
This is probably the most tricky part and you will need the needle and small scissors for this part.
Secure the button by a few extra stitches
Once you stitched around the entire circle, pull on the thread and you will notice how the fabric moves into a dome-like shape. Your goal is to pull on the thread and close the gap, while tucking the edges of the fabric inside so that they do not show.
It may take a few tries, but your goal is to make sure the button has a rounded shape, and the raw edges of the fabric do not show.
Once this is done, place a few stitches over the closing so that the button holds together.
NOTE: do not cut the thread, you will use it to attach the button.
Step 4: Sew It On
Secure the button further by wrapping the thread around it
Now that you have the button ready, align it with the edge of your garment. In the 15th century, the buttons were not sewn on top of the fabric as we are used to, but instead were attaches to the edge. To sew the button, use the same needle and thread that is attached to it, and place a stitch leaving a little room. Then place a similar stitch but on the other side of the button, and work your way around for 5-10 stitches total. To finish, wrap the thread around your stitches to reinforce them further, and tie off your thread before cutting it.
You are all done! Now you can use the remaining circle of fabric for the next button, but remember to make another copy of it.
Bibliography
Sarah Thursfield, The Medieval Tailor’s Assistant 2015, 9781847978349


